In this video I will show you how to upload high quality video for Vimeo or YouTube and then how to upload high quality video for your phone or Instagram. The process for exporting video changes slightly depending on where you want to put it. I struggled getting this right at first but after I followed these simple steps it made my videos look a lot better.
Steps to exporting HQ video for Vimeo or Youtube
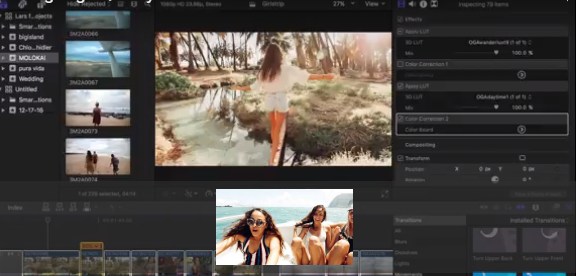
1. Once in Final Cut, select all of the clip that you want to export and press "command"+"e"
2. There will be a box that pops up. In the top right select "settings." From there I select "Apple ProRes 422 HQ" if uploading the video to Vimeo and
3. Once you have selected your resolution choice click "next" and choose where you which folder you would like to put it in your computer.
4. After saving it to the folder of your choice click "save". You will then see a wheel spinning as it exports and a new window will pop-up when the video is fully exported. Once it is fully exported you can watch it on your computer or upload it to Vimeo or YouTube.
Steps to exporting HQ video for your phone or Instagram
1. Once in Final Cut, go to "file > share > Apple Devices 1080 p"
2. A window will pop-up and click "settings" in the top right. Now make sure the setting are as follows:
Format: Apple Devices
Video Codec: H.264 Faster Encode
Resolution: 920x1080
Open with: QuickTime Player (default)
3. Once you have selected the right options click "next" and choose where you which folder you would like to put it in your computer.
4. After saving it to the folder of your choice click "save". You will then see a wheel spinning as it exports and a new window will pop-up when the video is fully exported. Once it is fully exported you can either airdrop the video to your phone or upload it to dropbox and download it from dropbox using your phone.